Dec 20, 2014

Building Concepts II Course Final Week CMCC- 8' x 12' Bent Wall(s) Assembly Week 13


 With our last week of school for the fall semester, we managed to erect all of our bent walls. A bent wall is any timber frame wall or wall sections that are made up of vertical posts and horizontal beams with diagonal braces supporting the beams and transferring load to the posts. In the photo to the right is our example of a brace holding up a beam. There we laid out our bent wall and then pulled it tightly together using clamps. Then we mark where our corner braces we going to land. Clamping everything down insures that both mortise and tenon join properly during assembly.
Here is the mortise that has been cut!

Here is the mortise that has not been cut on the beam, so now its clear exactly where the mortise needs to be in order to fit securely.


Here is that same wall we layed out before assembled and upright. The joinery went very well using the technique we were shown.


 That is going to be all until the spring semester begins were we will pick where we left off and complete the roof system and finish the project!


Dec 14, 2014

Building Concepts II Course CMCC- 8' x 12' Post and Beam Bent Walls and Knee Braces Week 12


 This week we invested much of our time in getting the wood to a usable condition. A lot of planing and jointing with the planer. Also we got introduced in electric hand planers. They produce quite a pile of chips afterwards just for your information. We used a 3 1/2" planer and a larger planer for 6" by 6" timbers. We would only plane 3 out of 4 sides because of side was going to be exterior faced and that one gets covered up! Check it out


Dec 7, 2014

Site Surveying Week 11 CMCC- Laser Level Field Assignment and Realistic Application


 In the photo above and to the right is a BOSCH brand laser level. This is a highly efficient piece of equipment and that  efficiency comes from its ability to self-level which mean just lay it down on any stable surface or tripod and it will level. But also because it shoots a bright beam across every surface in a room 360 degrees giving you a "level reference line" to work off. Now with this line, you can see how level existing siding is which is what we used it to determine. Additionally you can establish level reference lines for installing new siding, a suspended ceiling is also another application for using this 360 degree laser level.


 With the measurement in the photo below, from floor to the the laser level line, we went to the other end of the building to determine whether the siding was spot on level or off by any amount of 16ths of an inch.


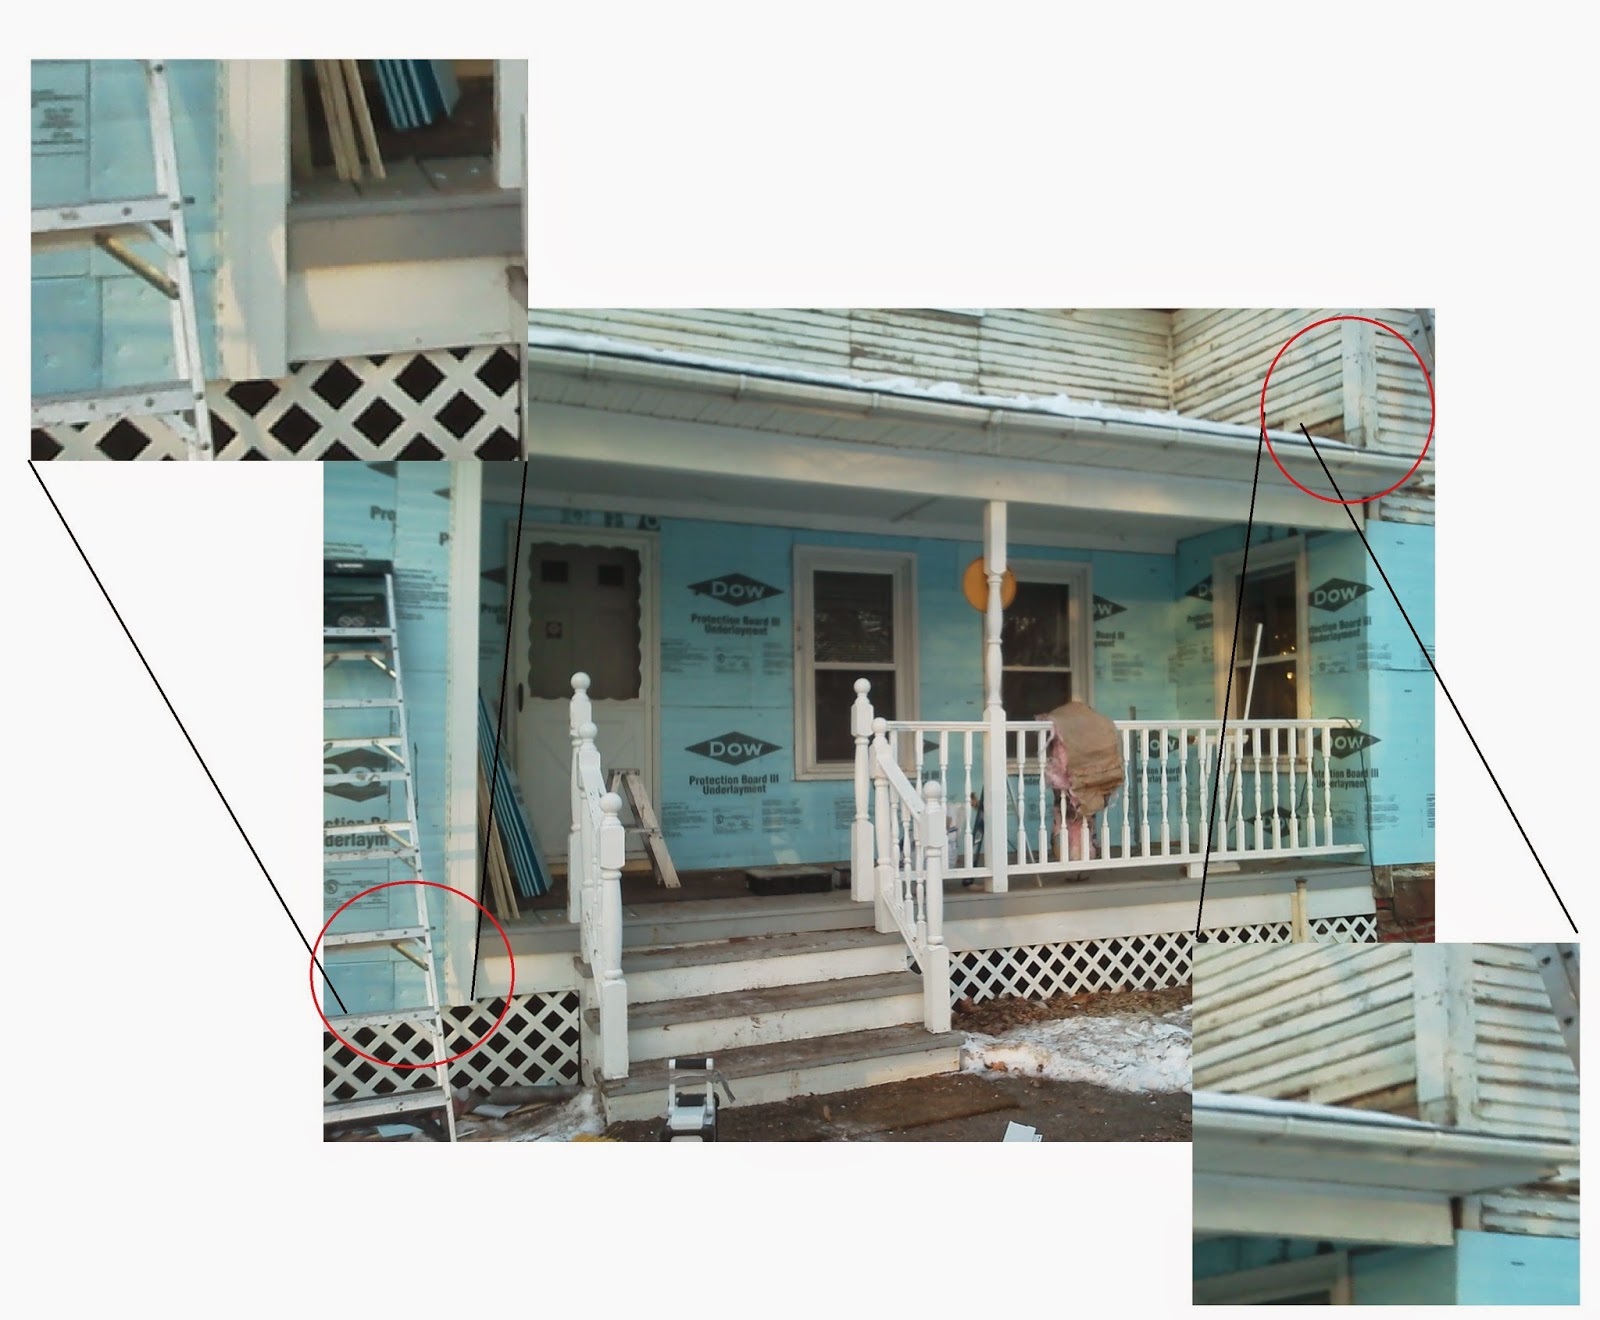
   Real world application. Currently this is a "live" siding replacement project I was hired for and it just so happens that I came to class with a question that could be answered through the field exercises in my Site Surveying class at CMCC. 

My question: How do I, using a fixed level reference line find where my siding is going to land on the upper level of a building which I cant shoot with my level from the ground?

Trying to get your siding to land symmetrically so that it lines up corner to corner produces great result in the end so careful planning in where you start can determine where you'll end up at a different level. Knowing how much space your siding takes up every course will put you in the ballpark for those questions. Multiple the reveal of the siding and determine where based on a measurement from point A to B that it will land from there. I have chosen to start installing vinyl on the porch walls, at least the first course, because where I have enhanced the photo below in the top left corner I have a little bit of room to begin my first course of siding moving it up or down to line up with the siding on the porch. The roof above the porch however I will have to run my siding up the wall to the right of the photo outside of the porch, until the roof, then bring my builders level up to the roof and shoot level reference lines to follow but the roof siding should not be installed before anything else. 

Building Concepts II Course CMCC- 8' x 12' Post and Beam- Completed Floor System Week 11


 We got a lot of work done this week with 3 full school days! We completed the flooring system and got all the corner posts cut to length and notched. As much as a good tongue and notch is important, the shoulder length is equally as crucial. A shoulder is the portion of the cut that does not sit inside a member but instead on that same member butts up too it. Cutting those to the right length creates the size of the building cutting them wrong defeats that joist or rafters usability completely. When building one for the first time, the notching is important but if the notching isn't perfect its not the end of that member, however if its cut short on its shoulder length, that member can no longer be used.
 Here in the photo to the left you can see a a dovetail joint was made for the jointing of the sill and floor joist. A dovetail as you can see pretty clearly it a joint between wood in the shape of a dove's tail or bird tail. A popular joint because of its strength and inability to flex out of the joint in any direction other than straight up which wont ever naturally happen once the building it completed.


Building Concepts II Course CMCC- 8' x 12' Post and Beam- Sill Notching Week 10

This week we had only one day to dedicate to our timber frame shed here at CMCC. Labeling and layout were two very important things we learned this week. With any timber frame buildings, even ones as small as this 8' x 12' building, labeling is crucial because each component is individually cut and "edited" to fit its receiving pocket. Also, each piece in this case was cut by a different team member. In our team there are three so consulting with each group member before cutting or fitting something that you don't know much about is a good habit to form. Additionally, we also cut and mortised out the ends of our girders and one end of  a single joist. Check it out.