Dec 7, 2014

Site Surveying Week 11 CMCC- Laser Level Field Assignment and Realistic Application


 In the photo above and to the right is a BOSCH brand laser level. This is a highly efficient piece of equipment and that  efficiency comes from its ability to self-level which mean just lay it down on any stable surface or tripod and it will level. But also because it shoots a bright beam across every surface in a room 360 degrees giving you a "level reference line" to work off. Now with this line, you can see how level existing siding is which is what we used it to determine. Additionally you can establish level reference lines for installing new siding, a suspended ceiling is also another application for using this 360 degree laser level.


 With the measurement in the photo below, from floor to the the laser level line, we went to the other end of the building to determine whether the siding was spot on level or off by any amount of 16ths of an inch.


   Real world application. Currently this is a "live" siding replacement project I was hired for and it just so happens that I came to class with a question that could be answered through the field exercises in my Site Surveying class at CMCC. 

My question: How do I, using a fixed level reference line find where my siding is going to land on the upper level of a building which I cant shoot with my level from the ground?

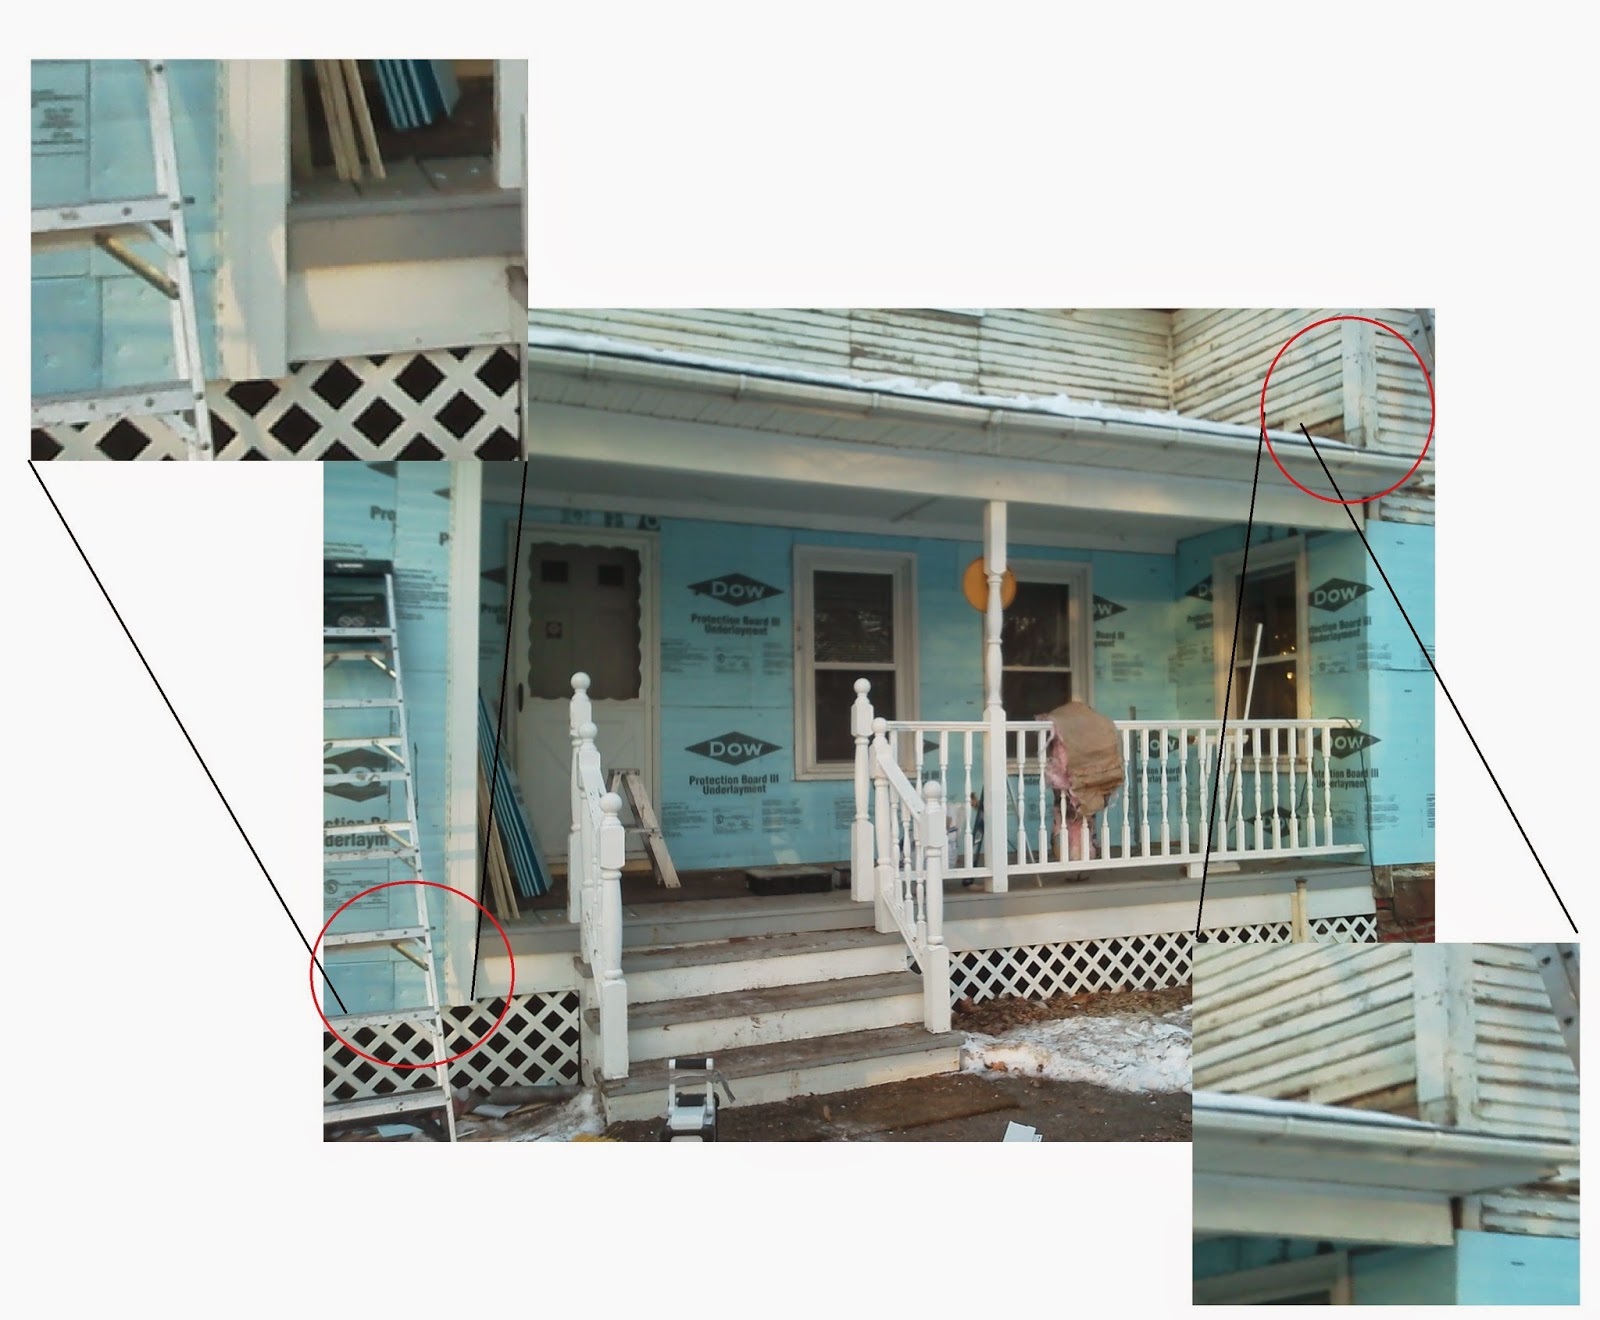
Trying to get your siding to land symmetrically so that it lines up corner to corner produces great result in the end so careful planning in where you start can determine where you'll end up at a different level. Knowing how much space your siding takes up every course will put you in the ballpark for those questions. Multiple the reveal of the siding and determine where based on a measurement from point A to B that it will land from there. I have chosen to start installing vinyl on the porch walls, at least the first course, because where I have enhanced the photo below in the top left corner I have a little bit of room to begin my first course of siding moving it up or down to line up with the siding on the porch. The roof above the porch however I will have to run my siding up the wall to the right of the photo outside of the porch, until the roof, then bring my builders level up to the roof and shoot level reference lines to follow but the roof siding should not be installed before anything else. 

Building Concepts II Course CMCC- 8' x 12' Post and Beam- Completed Floor System Week 11


 We got a lot of work done this week with 3 full school days! We completed the flooring system and got all the corner posts cut to length and notched. As much as a good tongue and notch is important, the shoulder length is equally as crucial. A shoulder is the portion of the cut that does not sit inside a member but instead on that same member butts up too it. Cutting those to the right length creates the size of the building cutting them wrong defeats that joist or rafters usability completely. When building one for the first time, the notching is important but if the notching isn't perfect its not the end of that member, however if its cut short on its shoulder length, that member can no longer be used.
 Here in the photo to the left you can see a a dovetail joint was made for the jointing of the sill and floor joist. A dovetail as you can see pretty clearly it a joint between wood in the shape of a dove's tail or bird tail. A popular joint because of its strength and inability to flex out of the joint in any direction other than straight up which wont ever naturally happen once the building it completed.


Building Concepts II Course CMCC- 8' x 12' Post and Beam- Sill Notching Week 10

This week we had only one day to dedicate to our timber frame shed here at CMCC. Labeling and layout were two very important things we learned this week. With any timber frame buildings, even ones as small as this 8' x 12' building, labeling is crucial because each component is individually cut and "edited" to fit its receiving pocket. Also, each piece in this case was cut by a different team member. In our team there are three so consulting with each group member before cutting or fitting something that you don't know much about is a good habit to form. Additionally, we also cut and mortised out the ends of our girders and one end of  a single joist. Check it out.  


Nov 23, 2014

Building Concepts II Course CMCC- Beginnings of an 8' x 12' Post and Beam Shed Week 9


This week we started the very beginning stages of our timber frame sheds. We will be constructing and 8' wide by 12' long post and beam shed building out of 6" x 6" timbers, as well as 4" x 4" and some 2" x 6" pieces also. In these series of photos what I am in the process of constructing is a knee brace like the ones we will be constructing for each corner post that will join to their connecting girders. We begin with practice pieces so we can understand the very delicate measurements necessary for an "effective" timber frame. If areas on the frame, like knee braces for example, are not exact and secure then the effect and strength of that area on the timber frame is somewhat lost. Patience and precision with a sharp chisel is what will give this project a good result.


Here you can see four holes we pre-drilled to help keep inside our soon to be mortise which is outlined in lead on the timber.


 Now I am chiseling out the 45 degree angle into the timber needed for the 45 degree tenon we cut on the knee brace.


Nov 15, 2014

Building Concepts II Course CMCC- 12' x 24' Gable Shed Truss Construction and Building Assembly Week 8

 This weeks in-class time was devoted toward building two gable end trusses to have soffit and fascia material attached to it. A Soffit is something that forms a ceiling along the eve or ridge of something. A Fascia is any material used as a band or frieze running horizontally around a whole building roof system typically. Decks can also have fascia boards. Typically the widest edge of any fascia material is sitting upright. The things in the photo to the left that look like ladders are the fly rafter frames. Fly-rafters are members of a roof system that run parallel with the rake toward the top of the wall but they do not ever touch the wall plates because they are completing the overhang on the gable ends where the roof will stick out beyond the building.


This material being nailed is a plywood soffit.

The material being pocket screwed is the fascia boards.


Here I am utilizing my speed square to keep my nails in alignment while I am fastening the fascia to the ladder fly-rafter that was constructed.  

ASSEMBLY of our 12' x 24' Storage Shed

 
We volunteered our time on Friday the 14th of November to help assemble the 12' x 24' shed building we constructed that was then picked and driven to Readfeild ME where it was to be a shed for the Maranacook High School track team. We had several students from the first year BCT program commute to help erect this shed. As you can tell we got some snow that morning, but in the photo above we are laying our first platform section on a gravel pad. 


Here you can see it begin to take its shape the same as it did when it was at CMCC in the building shop.


Here we have one gable end truss on and several other trusses installed. 


Here is about as far as we could get before we had to pack up and call it a day. Both gable end trusses were installed and all of the middle trusses. We only had a day to try and complete it but with only a handful of students and not the whole class we had to just do what we could with the time we had. Later in the week Maranacook High School is having a community day where anyone can work on it to complete it. But we got a good majority of it up and assemble in just one day.